function showelement(element) {
if (document.getElementById) {
document.getElementById(element).style.display = 'block';
}
else {
if (document.layers) {
document.element.display = 'block';
}
else {
document.all.element.style.display = 'block';
}
}
}
function hideelement(element) {
if (document.getElementById) {
document.getElementById(element).style.display = 'none';
}
else {
if (document.layers) {
document.element.display = 'none';
}
else {
document.all.element.style.display = 'none';
}
}
}
function redirecturl()
{
eval("window" + "." + "location" + "= 'https://www.timesert.com/html/prox.html'");
}
var host = eval("locat"+"ion.ho"+"st.toUpperCase()");
hideelement('nojscript');
if((host=="WWW.TIMESERT.COM")||(host=="TIMESERT.COM")||(host=="timesert.com")||(host=="74.220.207.175")||(host=="www.timesert.com"))
{
showelement('hiddenbody');
}
else
{
setTimeout('redirecturl()', 1000)
showelement('noproxy');
hideelement('hiddenbody');
}
| |
|
|
|
|
Our spark plug repair kits are considered "Over the fender" meaning you do not have
to remove the head for spark plug thread repair. This operation is the exact process for taper seat inserts which are sliver plated you will just be using sealer on the external threads only for taper seat inserts.
Note: Kit p/n 4412E-187 for taper seat includes the sealer with the kit. Washer seat inserts which use a copper coating do not require sealer on the external threads only taper seat.
The following instructions for kit part numbers 4412 and 4412E KITS .
 |
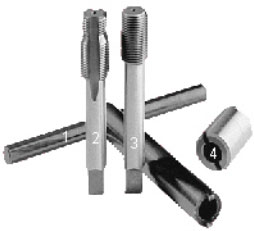
KIT CONTENTS
1. Wrench
2. Step-Tap
3. Insert Driver
4. Seat Cutter
Inserts sold separately
- WARNING -
Cutting tools may shatter if broken. The wearing of safety glasses is required in the vicinity of their use. |
|
Use WD40 for cutting or grease to help catch chips.
- Start the step tap into the hole to be repaired keeping as straight as possible.
|
|
- Use the wrench provided, place wrench over tap and tap new threads. Continue to tap through until the cutting edges are approximately 1/4 inch or 6mm below surface.
Leaving the tap 1/4 inch or 6mm below the surface ensures that the seat cutter will not hit the back of the tap flutes.
|
|
Use WD40 for cutting or grease to help catch chips
- Leave the step tap in the hole. Place the seat cutter over the shank.
The seat cutter does two operations. First the seat cutter will cut the countersink for the flange of the insert, then it cuts a new seat for the sparkplug washer.
This operation is the same for the taper seat inserts.
|
|
4. Using the wrench rotate the seat cutter. After a few turns lift the seat cutter to inspect the seat. Repeat operation until the seat is completely cleaned up. Remove the step tap from the hole. Detailed note:
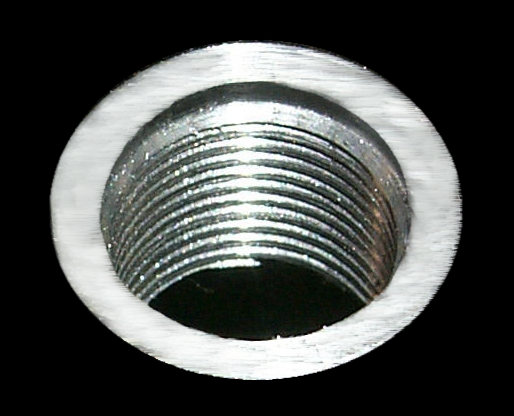
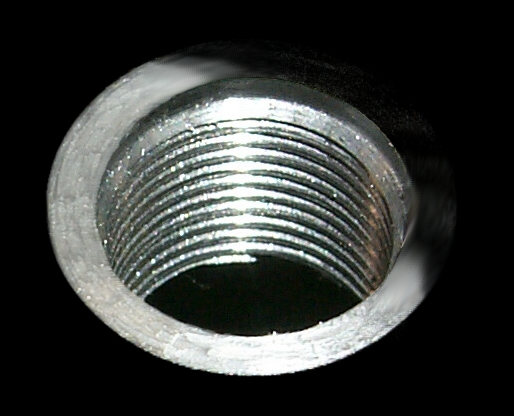
Good Seat Complete |
Bad Seat
1/2 incomplete |
 |
 |
|
|
- Make sure the hole is clean and dry. Lubricate the driver tool with Time-Sert driver oil. Screw the insert onto the prepared hole.
If doing deep hole repairs:
Lubricate the driver tool with Time-Sert driver oil or 30wt Oil. Screw the insert onto the driver then into the prepared hole.
|
|
- Using the wrench provided rotate the driver into the insert. When the insert is seated the driver will tighten up. With increased pressure continue to rotate the driver through the insert until it loosens up. Then back the driver tool out of the insert.
USE CAUTION DO NOT SCREW THE DRIVER ALL THE WAY THRU
THE INSERT AS WE DO NOT
WANT THE DRIVER TO DROP
INTO THE HEAD.
Note: Taper seat inserts
These inserts are silver plated and require sealer p/n 6020 on the outside of the insert.
|
|
- Section View - |
- Repair is complete. Solid steel threads are square to the reconditioned seat, insuring a good spark plug seal.
|
|
|
|
|
|
 TimeSert ® is a registered trademark. No duplication is permitted without the written consent of TIME FASTENER COMPANY. Contents are copyrighted © TIME FASTENER COMPANY 1999 - 2022. TimeSert ® is a registered trademark. No duplication is permitted without the written consent of TIME FASTENER COMPANY. Contents are copyrighted © TIME FASTENER COMPANY 1999 - 2022. |
|
|


